
![]()
The following procedure has been used successfully by myself for several printers. If you luck out and can use your printer driver's default settings, great. Otherwise, it make take an hour or more of printing and comparing test strips, using two sheets of paper. Note that although it's important to calibrate your monitor carefully, this procedure relies on a gray reference strip for calibration, and does not depend on having your monitor perfectly calibrated.:
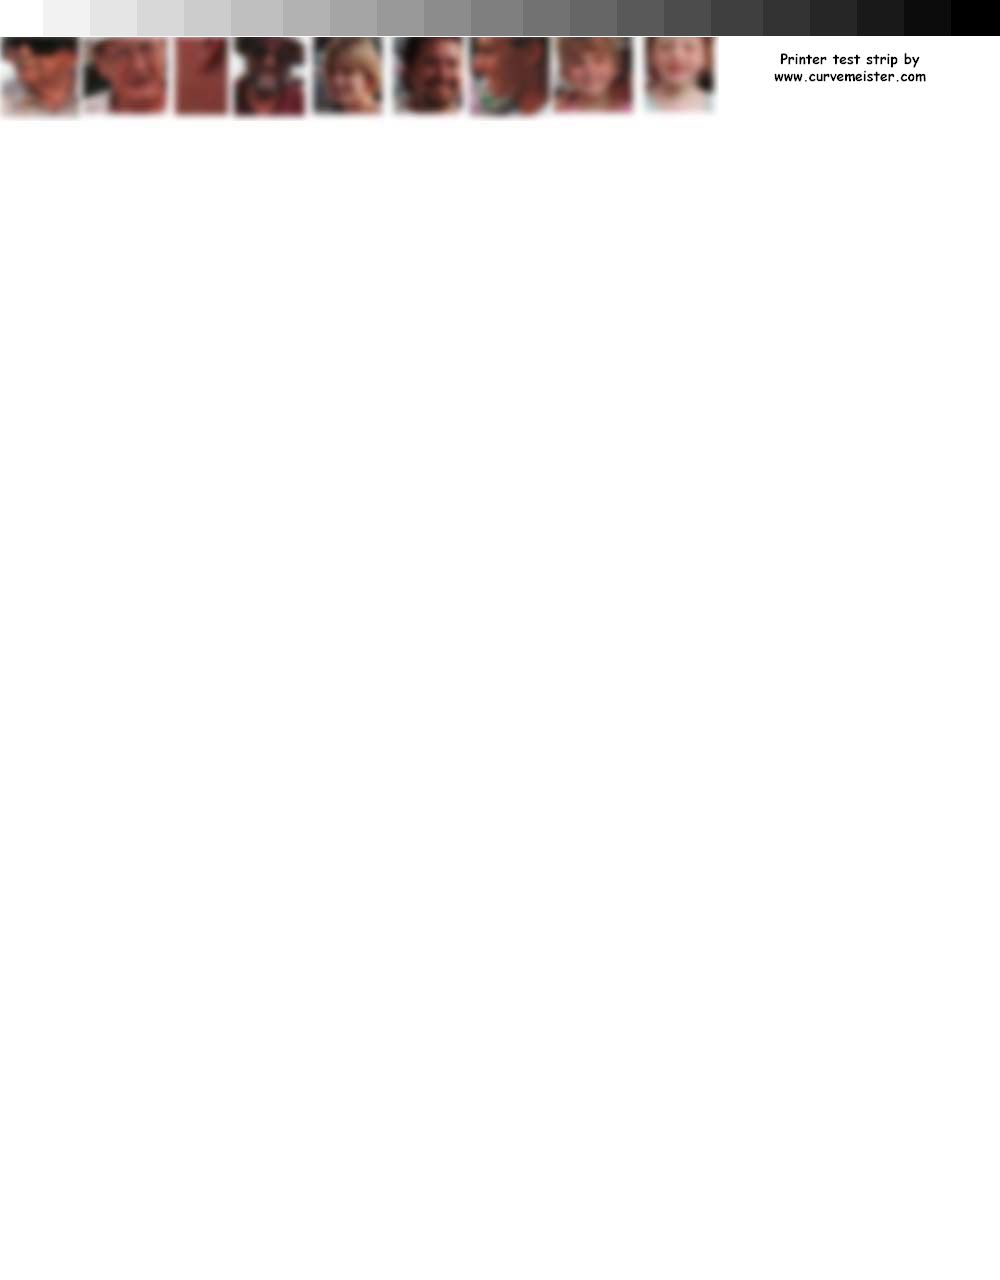
1) Set the driver to PhotoEnhance mode, and print a gray step wedge and verify that there is little or no color cast in the shadows and midtones.
2) If there is no color cast, you're done. As you print each step wedge, mark it with the date and settings so that you do not repeat any work. You will save several trees if you print the step wedge in the top inch or so of the page, and you can snip it off, and re-use the same sheet many times. Keep in mind that the lighting conditions will change the color appearance, as will drying time..
3) If there is a color cast, you have two choices. Either experiment with the various paper profiles that are available - if you're luck you'll find one that gives you a neutral test strip, or adjust the color sliders in the driver.
4) To adjust the colors in the driver, first determine whether the overall test strip is too light or too dark. Use your monitor for comparing the overall brightness of the print. In addiiton to judging overall lightness using your monitor, if the dark ones blur together, your printer is printing too dark, if the light ones can't be distintuished, your printer is printing too light. Next, determine the color of the color cast, and whether it is too warm or too cold.
5) Based on your determinations in step 4, either back off on the color sliders (if the image was too dark) or add color (if the image was too light). In general terms, adding magenta and/or yellow make the image warmer, and subtracting them make the image cooler. Cyan is the opposite. Suppose, as was the case with the last Epson that I did this with, the image is too dark, and the step wedge has a pink cast to it. For this, you would back off on the magenta slider, about 6 units, and print your next step wedge. Remember to mark all the settings on each strip as you print them. This forms the basis of your systematic correction of the print appearance, and you may want to backtrack the next day as you see how the prints look when fully dried.
5) You'll be able to tell if you've overshot or not, and make adjustments accordingly, until you zero in on a step wedge that is the closest possible to neutral. Sometimes the step wedge will be warm in the shadows, and cool in the highlights, or vice versa, and this is an indication that you are about as close as you can get with this method, which should be pretty darn close.
Keep your test strips in a folder for later reference. Down the road, if you switch inks or paper, you can use your accumulation of test strips to help predict your next set of adjustments. There are good services that will create a profile for you, and they are an economical alternative to spending a small fortune on printer calibration equipment. Software based packages - Wiziwyg is one - that use a scanner to read a test print are hit and miss - I don't recommend them, but for dye based printers they sometimes work very well.
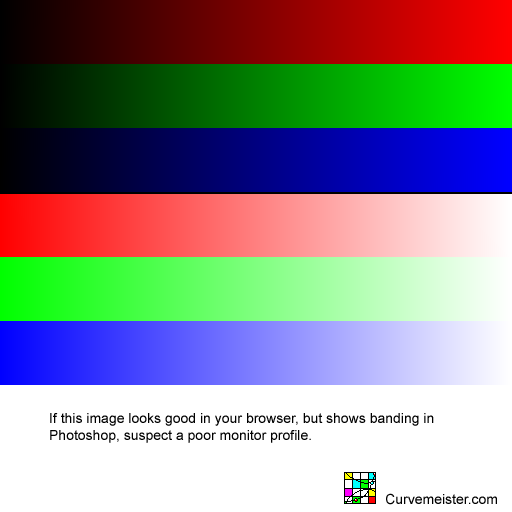
This image test for banding in your video lookup tables. The second set of three bands, in particular, will often show up problems with LCD displays that have been calibrated using an instrument. Right click on the image below, and save it to your hard drive. Open the image in Photoshop and look for color shifts or abrupt changes in brigthness aka banding, an indication that your monitor is out of kilter. If the image looks fine here, but shows banding in Photoshop, suspect a monitor profile that incorrectly specifies different gamma values for red, green, and blue, or is otherwise broken. Recently, I had a problem with a purple band in the middle of the blue strip that was due in part to having a notebook LCD screen tilted at slightly the wrong angle.